Kiosk Mode on iPads with PWAs and Guided Access Mode
A great way to get an "almost-native" locked down app experience on iPads, perfect for using at live events where devices need to be unattended.

I regularly help experiential marketing agencies create apps for their events. These include branded games, quizzes, & interfaces that are used on-site via iPads. Because of tight turnarounds, the best way to deliver these apps and experience is via the browser as web apps.
Clients often want these experiences locked-down at the event. In other words they don't want users being able to access the underlying iPadOS. Instead, they want to restrict access to the single application developed for the event.
This is known as “kiosk mode” and has traditionally been a bit of a faff on iPads, particularly when using web applications via the browser.
 With guided access mode enabled, you can't swipe out or exit the screen.
Thankfully there are two recent features/technologies introduced that now make this possible:
- Safari’s adoption of “PWA”s
- iPadOS's “Guided Access Mode”
Using these two technologies together make for the perfect kiosk mode experience, without having to develop a native app. This makes the process much quicker and cheaper to develop and roll-out.
About PWAs
 PWA on the left, regular web app on the right. Notice the address bar.
PWA stands for “Progressive web app”. This is a browser technology that lets you run a website like a native app.
It allows you to add an icon to your Home Screen that can be clicked to launch your web app (almost) full-screen. This means the browser address bar and controls are all hidden, giving you a much slicker experience that resembles running a native App Store app.
Adding PWA support to website
Before you can install a PWA to your iPad Home Screen (see below), the web app you installing needs to be configured to support the feature. I'm not covering this process here as it's out of the scope of blog post and depends on your codebase.
About Guided Access Mode
This is an accessibility feature in iPadOS that lets you lock the iPad down to a single application. This is essential “child mode”, but it's also perfect for live events or other situations where you don't want people getting access to the underlying iPad environment.
Usually we could only lock the entire browser down using this mode. This is useful, but it's not perfect, as a user could potentially back-out of our web application and start browsing the web.
The trick here is that we're using this feature in tandem with a PWA. This means we can lock down the screen to our PWA application, not just the browser. This means the user can only interact with our web application.
Installing a PWA
Installing a PWA web application is easy. Open the website as normal and click the “share” icon in the top right toolbar. Scroll down and look for the “Add to Home Screen Button”:

Click this and you're done - there'll now be a new icon on your homescreen:
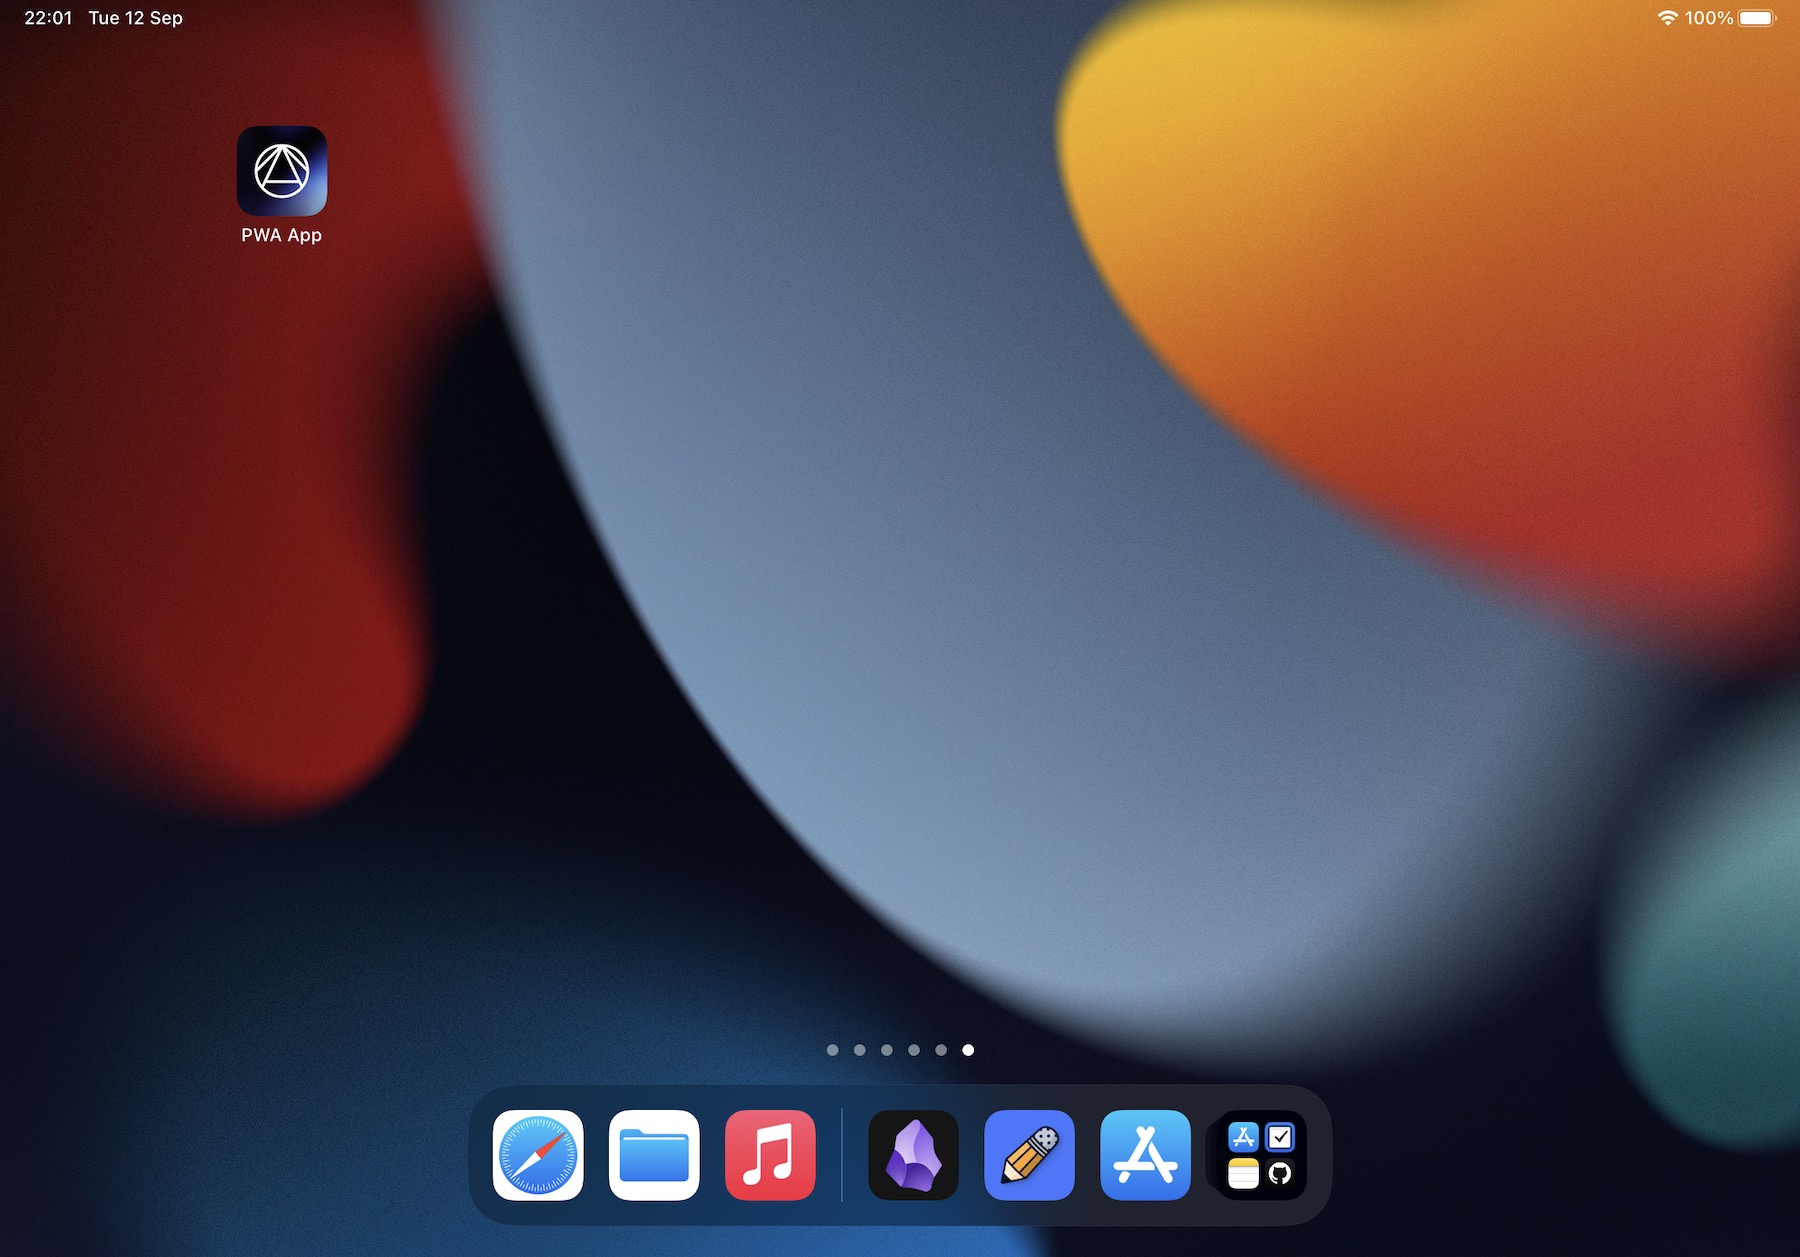
When you click the icon, the website should now open in full-screen mode.

Notice that there is no longer any address bar. Instead there is a thin menu bar, giving a more "full screen" and native feeling to the app.
The problem here is that we can still easily exist the app. This will be fixed in the next section.
Having issues?
Note that if you can't see this option, it's likely that the web application isn't properly configured. You'll need to look into the app codebase to figure out why this is.
Setting Up Guided Access Mode
This mode is also easy to configure, but it's not particularly intuitive. On your iPad, go to the settings and scroll down to the “Accessibility” section:
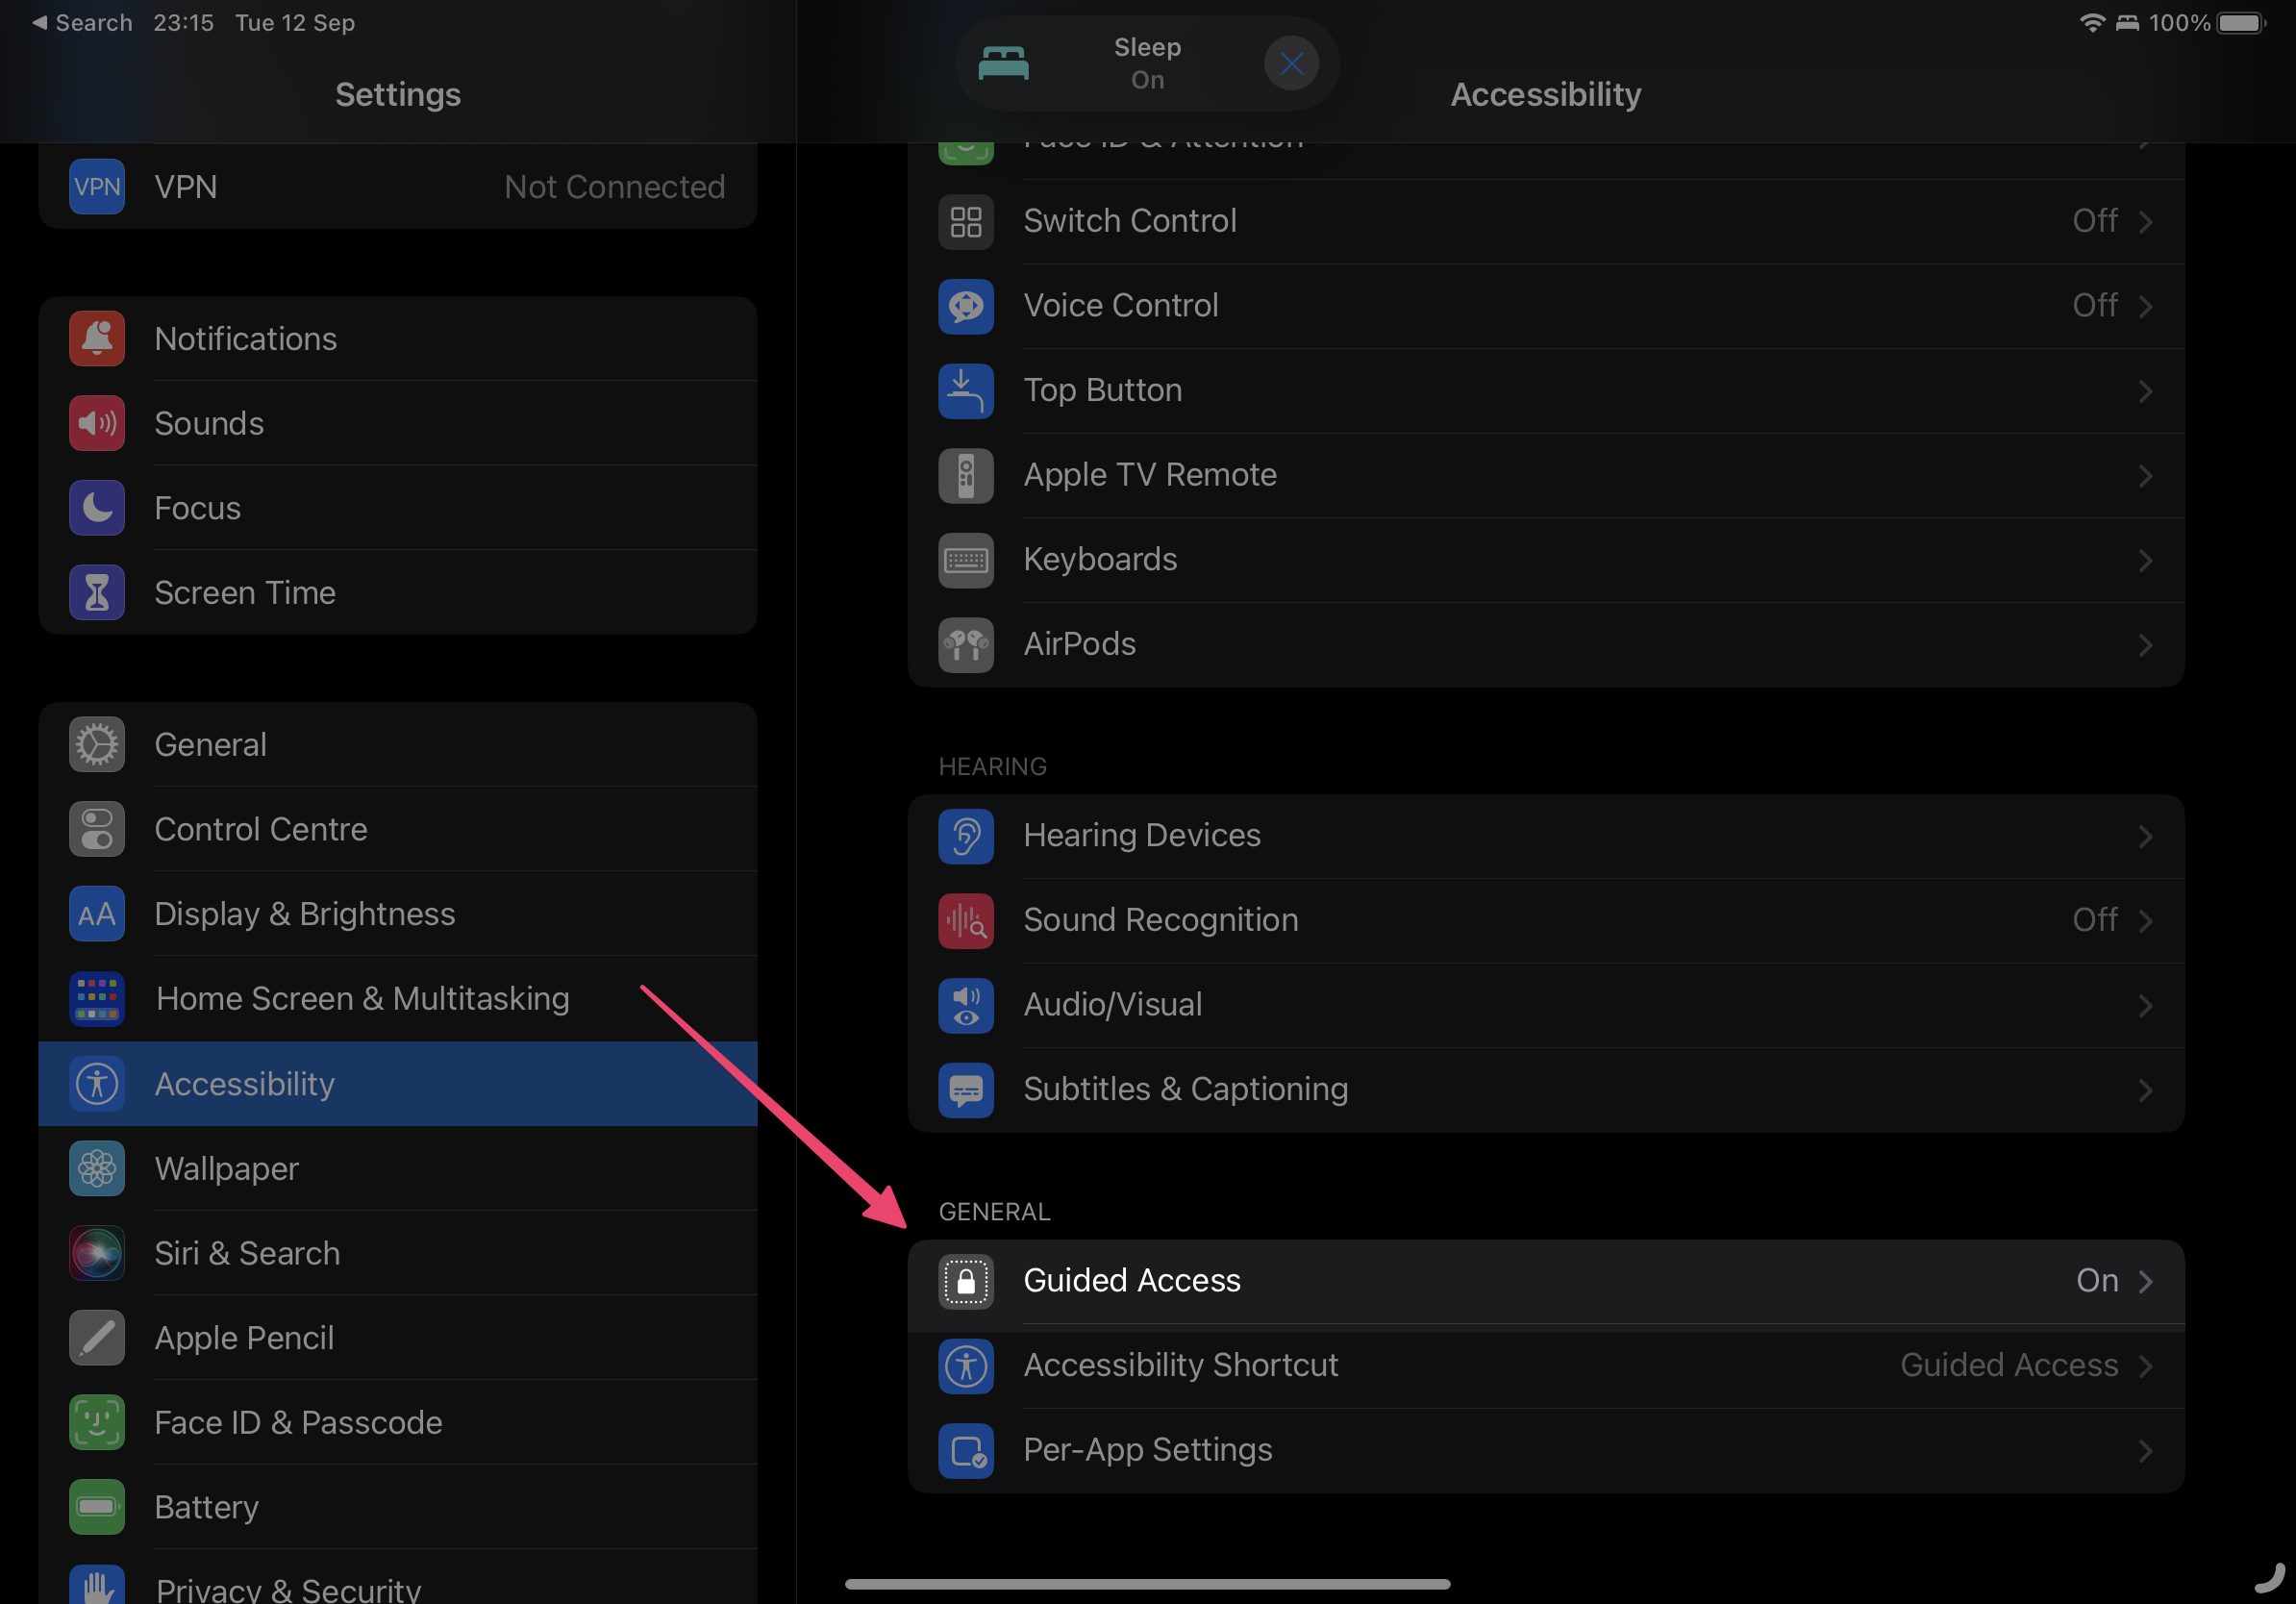
Scroll down the “Guided Access” option and click into it:
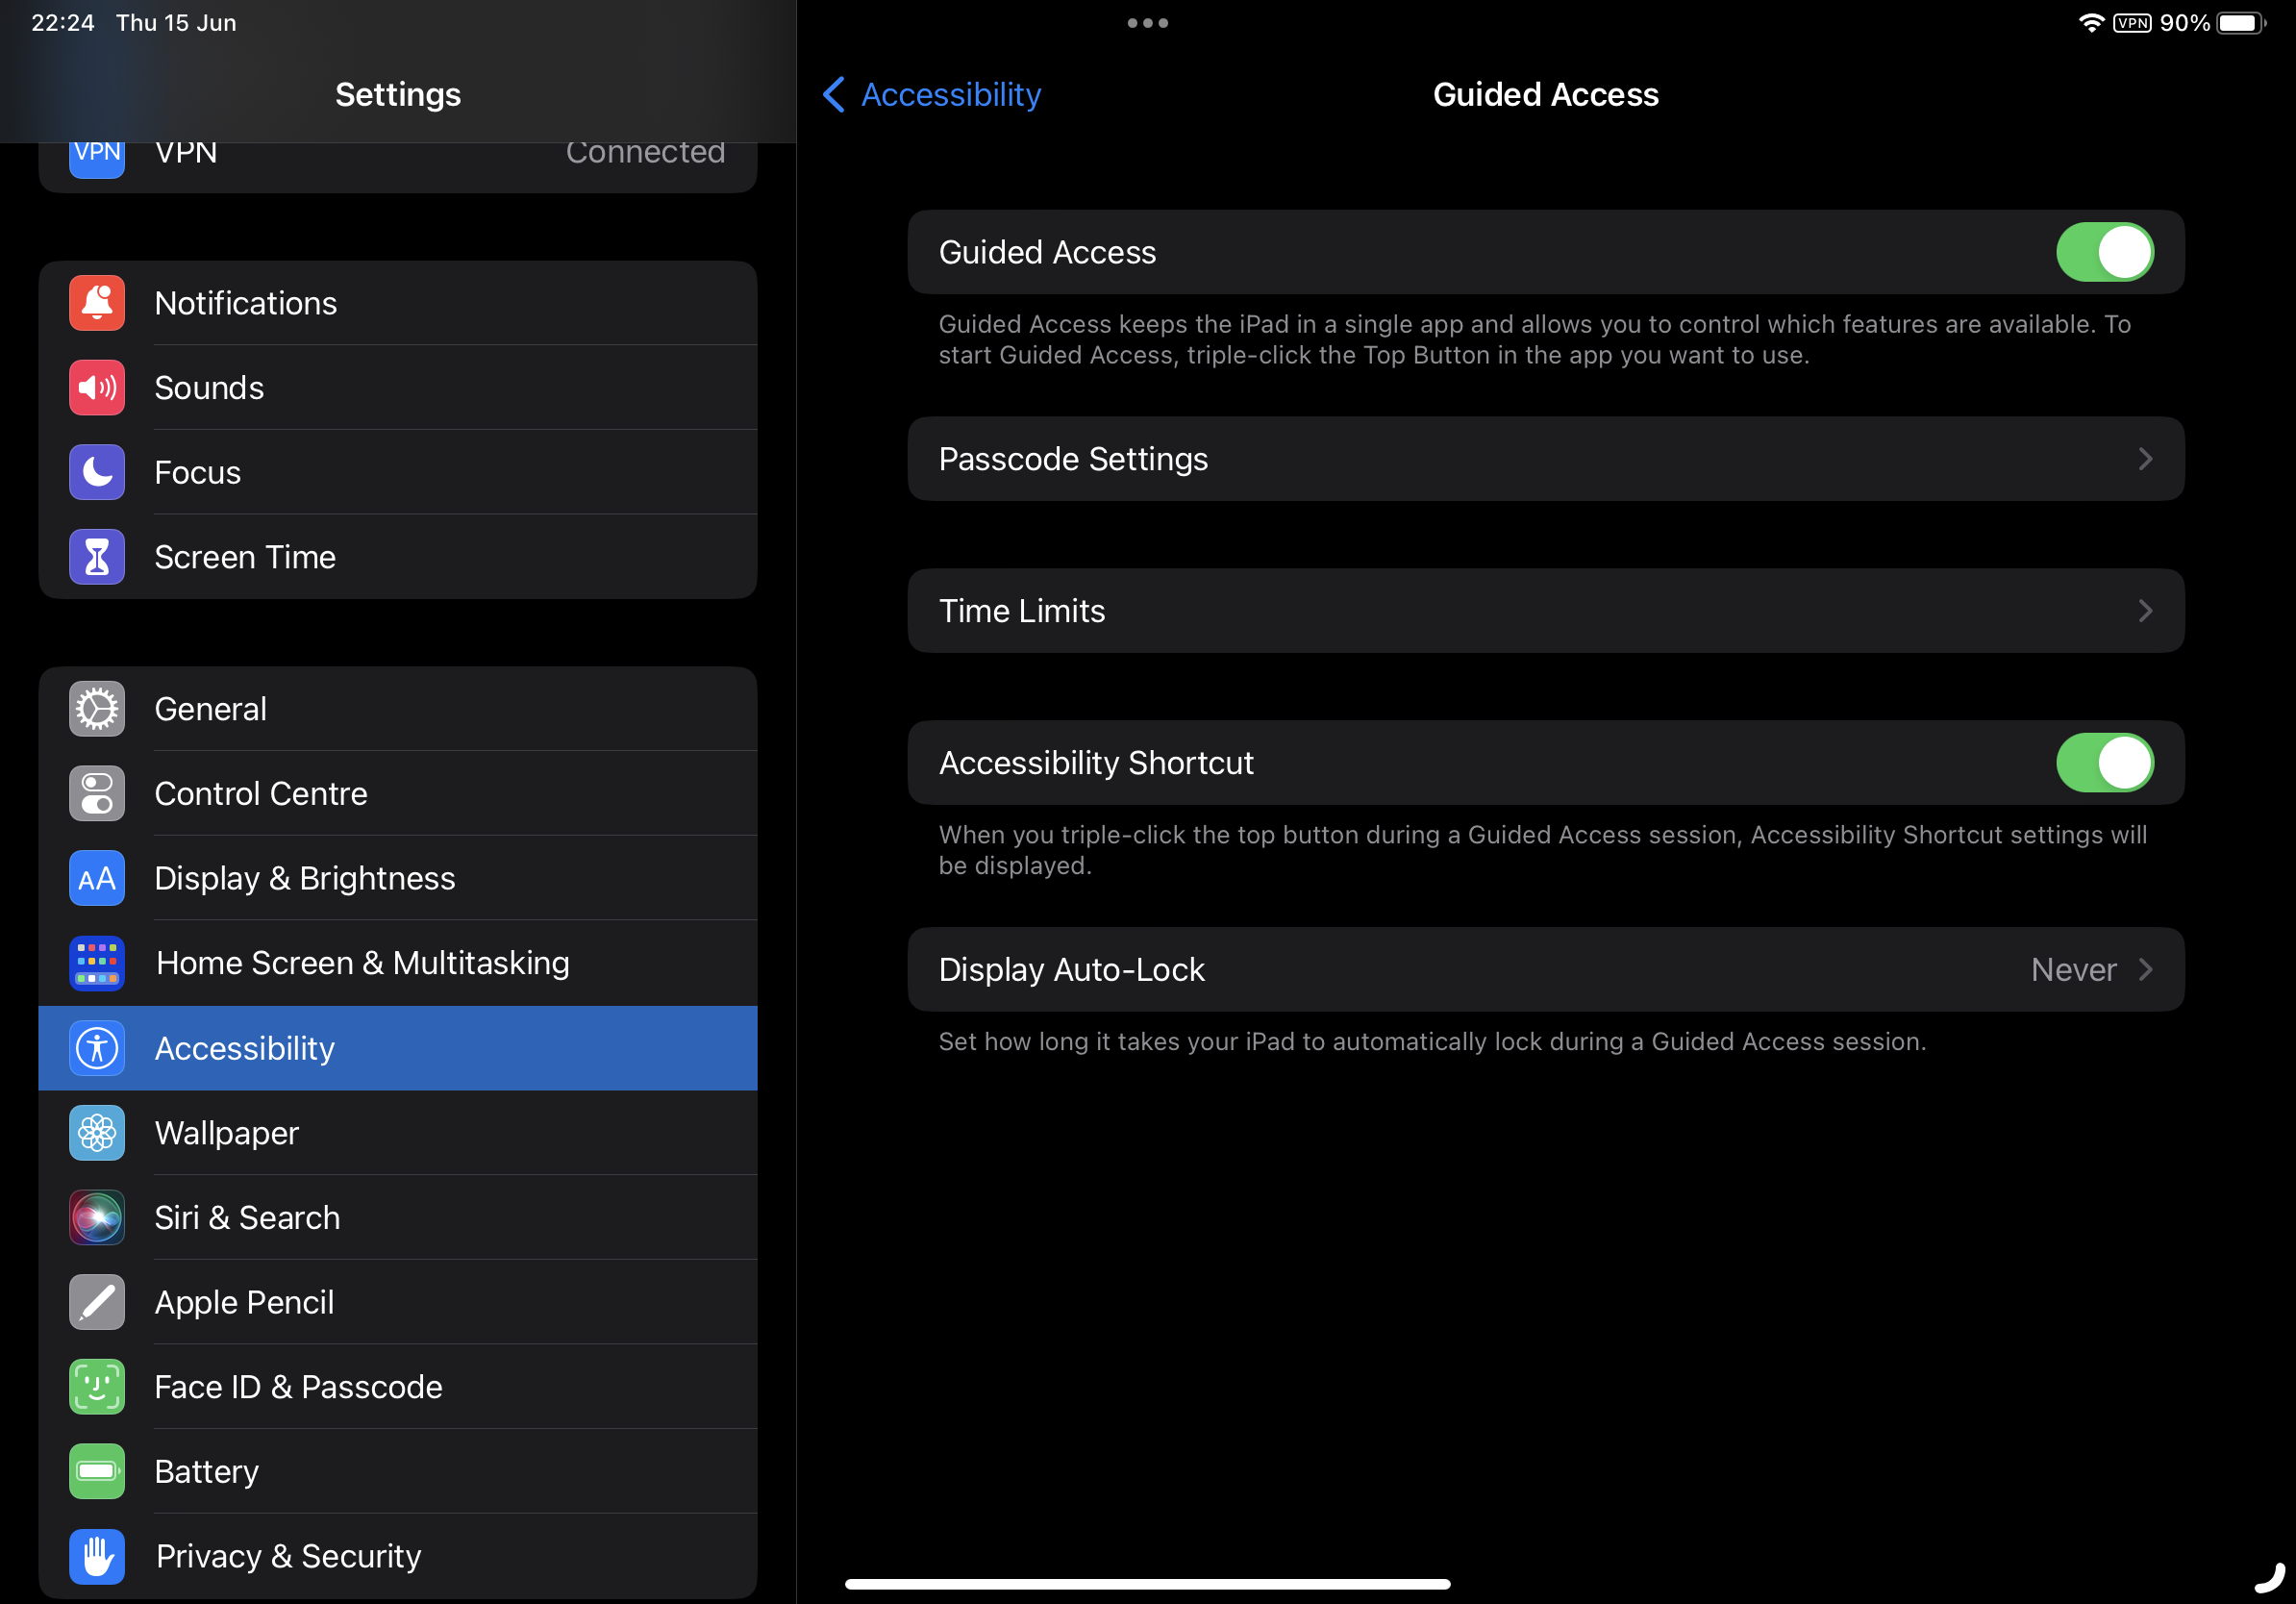
From here:
- Make sure the “Guided Access” toggle is turned on
- Set up a passcode via the “Passcode Settings” option. This will let you lock down the iPad to a particular passcode. You'll need this passcode to exit Guided Access Mode
- Ensure “Accessibility Shortcut” option is turned on
- Click the “Display Auto-Lock” section and turn it to “Never”
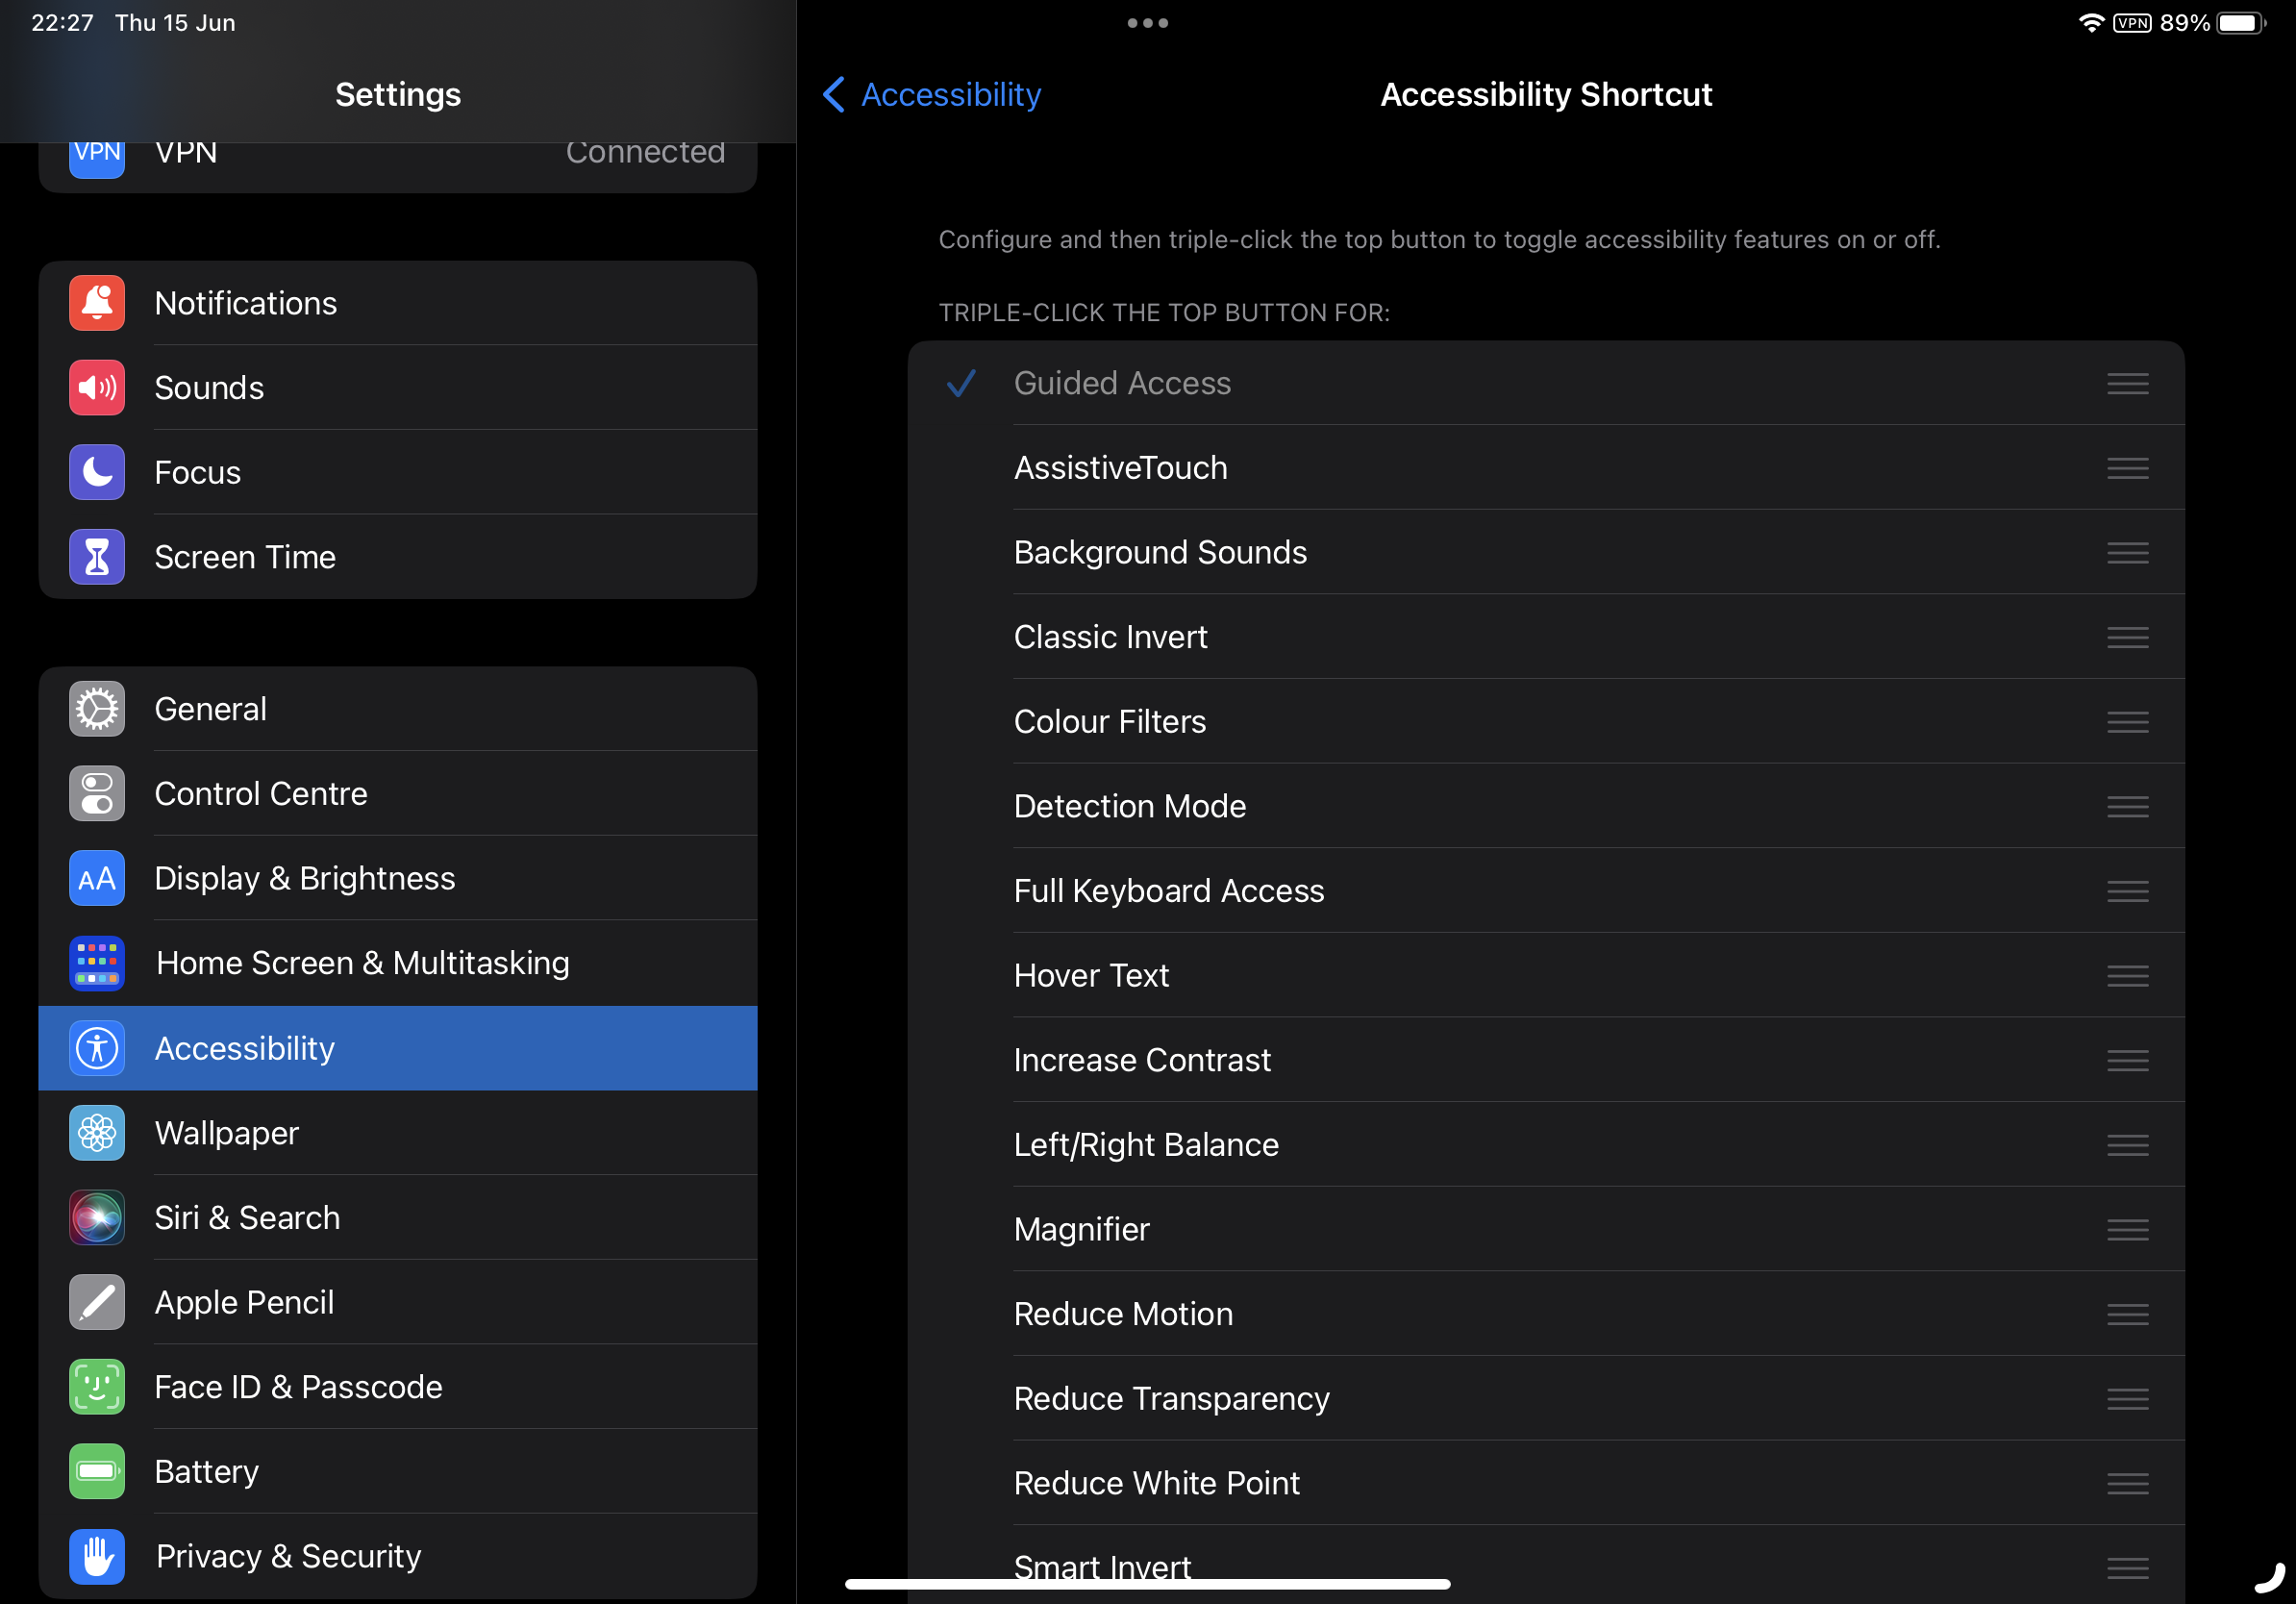
Finally, go back out of this section and then into the “Accessibility Shortcut” section. Here, make sure that the “Guided Access” option is ticked and that you've dragged it all the way to top of the screen.
Now you're ready to actually put your iPad in Guided Access mode. Open the PWA you installed in the previous step.
Click the physical lock button on the top-right of the iPad three times.
 Tap this three times
This will cause the app to zoom out and the Guided Access Mode configuration screen will come up. Here you can configure how restricted you want the experience to be. When ready hit “start”. The iPad will now be fully locked down to your app.

To exit this mode, hit the top-right lock button three times again. You'll be prompted for your passcode to exit Guided Access Mode.
Conclusion
Bringing the power of web-based PWA applications together with Guided Access Mode on iPadOS gives you an event-ready kiosk mode without any of the need for a full native application.
It only takes a little bit of configuration but will allow you to leave iPads unattended with confidence at your next event.